


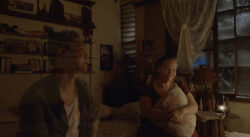
“Don’t look up” (Netflix), graded with DaVinci Resolve Studio
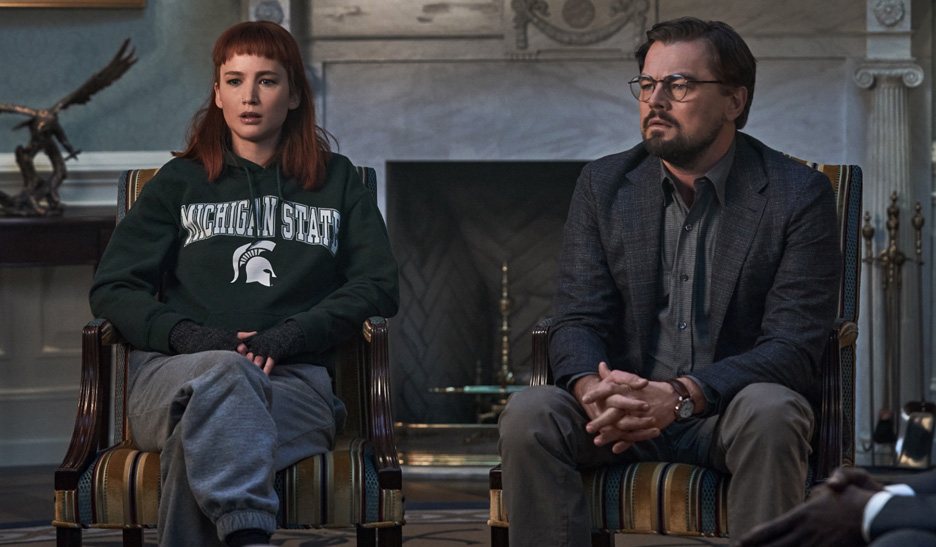
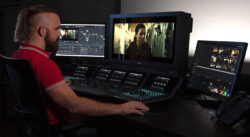
Matt Wallach (Company 3) turned to Blackmagic Design’s DaVinci Resolve Studio post-production software to colour grade Don’t Look Up (Netflix).
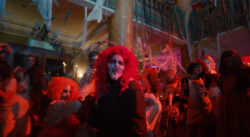
The Netflix film Don’t Look Up, photographed by Linus Sandgren, follows the lives of two academic astronomers who, after discovering that a comet’s trajectory is on track to destroy the world in six months, embark on a media campaign to warn humanity.
In recent years, Wallach has mainly been involved in the colour grading of the daily shots and has worked alongside the most renowned cinematographers, including Sand branch, who admires Wallach’s work and put him in charge of the colour grading of the daily shots and the final result in his previous film No Time to Die. Sandgren prefers to shoot on negatives, where possible, rather than digitally, and when colour grading, he tries to preserve the filmic look that this kind of recording gives the images. He also chooses to approach colour in such a way as to maintain the appearance achieved by photochemical development.
In the case of Don’t Look Up, Sandgren filmed images in a wide variety of formats in addition to negatives, which added to the complexity of the project: “It was predominantly a 35mm show but there was some anamorphic, some spherical, some Super 8 and a little bit of 16mm. There was also a lot that was shot with digital broadcast cameras in a studio type space for when characters are appearing on TV,” Wallach recalls.
The challenges of Don’t Look Up
One of the main challenges in dealing with colour on Don’t Look Up was the absence of a logarithmic file during the colour grading stage, which added to the difficulties of achieving vivid colour in scenes such as those that took place in television studios. “The broadcast footage wasn’t scans of raw files. It was shot in Rec. 709 color space, and it sort of is what it is,” added Wallach. “I initially approached it similarly to the rest of the material using offset and printer lights. Then once everything was balanced, we pushed the contrast and saturation and used several different curves within Resolve to see how far we could go until the image started to deteriorate,” says the colourist.
The sheer number of visual effects was also another issue, not just the major computer-generated shots, but also more subtle ones, not so obvious to viewers: “There were quite a few shots that may not have been VFX shots to begin with but became VFX shots because of the pandemic. There were limits to how many people could be on the set at any given time, including actors, so some setups became multi shot composites.”
The special effects team provided digital footage of a crowd, and together with 2D stills and volumetric captures, they were able to extend the shot from the 25 to 30 actors on set to a congregation of 100 or more people in a single frame. Using DaVinci Resolve Studio, the colourist was able to balance the different elements and ensure that the dynamic lighting was evenly distributed between the audience and all the elements in a natural way.

Experience with DaVinci Resolve
Wallach believes that the tools offered by DaVinci Resolve Studio helped him significantly to be more efficient in achieving the desired nuances: “I used the color warper tool, especially when matching in stock footage. I could have combined other tools to do the same work, but the color warper was very efficient for collaboration because I could change different parameters at the same time and show Linus how the image was affected in real time. When we were cutting back and forth between the film and the TV studio material, for instance, if we wanted the reds in the TV parts to be in a certain place, I could just grab those reds and push them in the right direction in a single move. I could make a global change more quickly than if I tried to do the same thing with keys or curves.”
Netflix released the feature film in cinemas as well as on its global online platform. This meant needing access to both tools that provide the ability to work with high dynamic range (HDR) and deliver a final product in DCI-P3 format. “I used the HDR wheels within Resolve quite a bit for the HDR passes of the film as opposed to using log wheels and curves to help control highlights. It really made up for the HDR trim process since the theatrical P3 was our hero grade. There’s a flexibility with the HDR wheels of being able to set the affected range for each zone and then just control the exposure of those zones individually. I think that the HDR wheels help you get to the desired place for your HDR versions in a simpler way than was possible previously,” concludes Wallach.
https://www.youtube.com/watch?v=RbIxYm3mKzI
Did you like this article?
Subscribe to our NEWSLETTER and you won't miss anything.
Related articles
 Tribeca contender ‘Sealed Off’, graded with DaVinci Resolve
 The unique film ‘Something in the Dirt’, graded with DaVinci Resolve
 The sadistic Santa Claus of ‘Violent Night’, graded with DaVinci Resolve Studio
 The music video for TikTok’s hit ‘Habit’ by Sekai No Owari was graded with DaVinci Resolve Studio
 Oscar-winner ‘Drive My Car’, graded with DaVinci Resolve Studio
 ‘Don’t Call It Mystery’ (Fuji Tv), graded with DaVinci Resolve Studio
 ‘Leonor will never die’, graded with DaVinci Resolve (Blackmagic)
 Sky Deutschland’s ‘Pagan Peak’ graded with DaVinci Resolve Studio
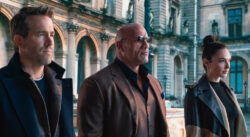 ‘Red Notice’ (Netflix), graded with DaVinci Resolve Studio
‘Red Alert’ (Netflix), graded with DaVinci Resolve Studio
‘Red Notice’ (Netflix), graded with DaVinci Resolve Studio
‘Red Alert’ (Netflix), graded with DaVinci Resolve Studio
 The Green Knight was graded with DaVinci Resolve Studio (Blackmagic Design)
 The third season of ‘Brassic’ (Sky) was graded with DaVinci Resolve Studio
 ‘Gaey Wa’r’, graded with Blackmagic Design’s DaVinci Resolve Studio
 Tones and I’s new music video, ‘Won’t Sleep’ edited and graded with DaVinci Resolve Studio