


DaVinci Resolve 11 y la Cinema Camera de Blackmagic, presentes en ‘Wolf Bite’, el último vídeo musical de Owl City
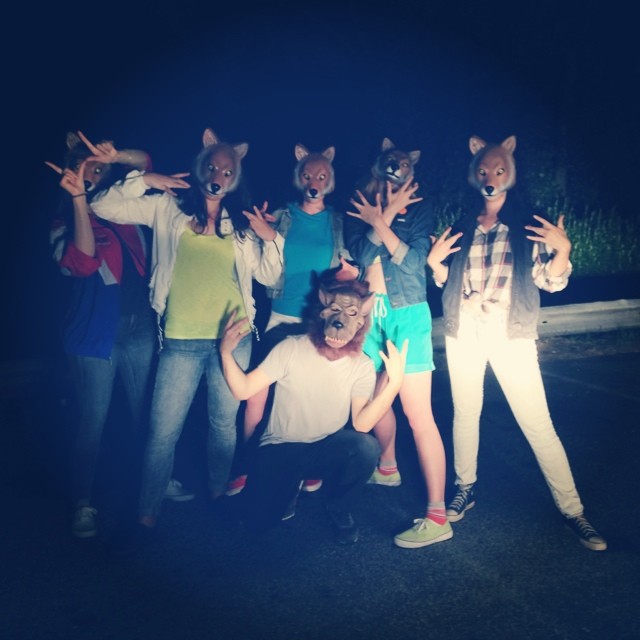
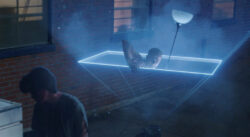
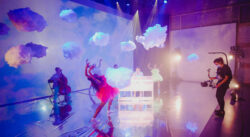
El vídeo muestra personas vestidas de hombre lobo bailando y andando en bicicleta por las calles de Nueva York. La secuencia rodada por el director de fotografía Tim Buttner y dirigida por Andrew William Ralph contiene elementos artísticos con distintas condiciones de luz y varios efectos especiales.
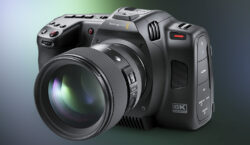
Wolf Bite, el último vídeo musical de Owl City se ha rodado íntegramente con la Cinema Camera de Blackmagic, mientras que el etalonaje del mismo se ha llevado a cabo con DaVinci Resolve 11. El vídeo corresponde a la canción más reciente del artista y es uno de los primeros proyectos finalizados con la última versión de DaVinci Resolve.
Wolf Bite forma parte de Ultraviolet, el último CD de Owl City que sigue a otros éxitos tales como Fireflies, Vanilla Twilight y Good Time (a dúo con Carly Rae Jepsen). El vídeo muestra personas vestidas de hombre lobo bailando y andando en bicicleta por las calles de Nueva York. La secuencia rodada por el director de fotografía Tim Buttner y dirigida por Andrew William Ralph contiene elementos artísticos con distintas condiciones de luz y varios efectos especiales.
Buttner reconoce que “cuando hablé con Andrew antes de comenzar el rodaje decidimos que el vídeo debía tener un aspecto más bien artístico y abierto, considerando que luego iba a agregarle animaciones. Lo primero que me pidió fue que filmara la luna. Sin embargo, la fase de luna llena había finalizado unos días antes. Pero, afortunadamente, ya había captado imágenes de la luna en invierno para uso personal con mi Cinema Camera de Blackmagic en formato RAW a 24 f/s. Esta toma nos brindó un punto de partida y determinó la frecuencia de imagen para el proyecto”.
 Por su parte, Ralph ha destacado que “el rodaje de las tomas nocturnas con las bicicletas supuso un reto para el equipo debido a las restricciones en la iluminación. Para filmar las imágenes, Tim colocó la cámara en la parte trasera de un vehículo en movimiento con una lámpara portátil debajo del mismo. Al grabar la secuencia por intervalos de tiempo que se ve en el vídeo, Tim empleó la Cinema Camera para captar luces fuera de foco que posteriormente utilizó como un efecto superpuesto sobre la imagen”.
“Quedamos muy satisfechos con el rendimiento de la cámara en condiciones de escasa luz, incluso a 800 ASA. Decidí no pasarme de este valor para evitar el ruido en las imágenes, y luego en la posproducción aumenté la exposición un poco más, aproximadamente medio paso. La luz de los faroles le dio una apariencia agradable a la calle, pero resalté este aspecto aun más en DaVinci Resolve”, destacó Buttner.
Para las escenas con los bailarines, Andrew le pidió a Tim que buscara luces que simularan los faros de un coche. Tim rápidamente encontró la solución: utilizó los faros de un coche real. Según Tim, eran lo suficientemente brillantes, y además la cámara funcionó tan bien en ambientes poco iluminados que pudieron realizar las tomas sin necesidad de utilizar lámparas cinematográficas.
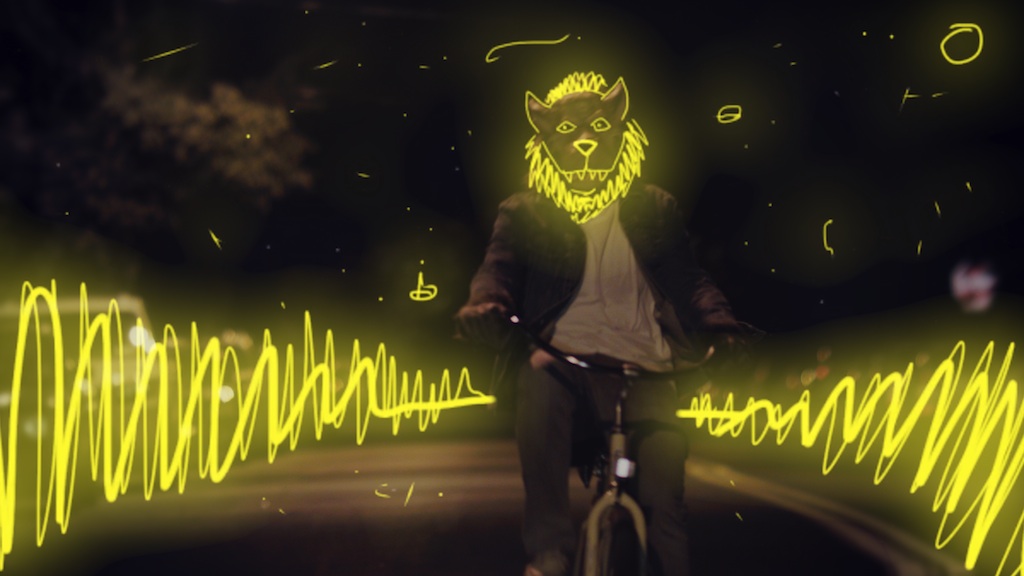
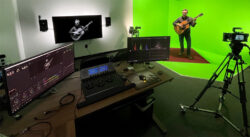
Asimismo, Tim usó la Cinema Camera de Blackmagic para filmar imágenes de una máscara de lobo con ojos brillantes que aparece superpuesta en ciertas escenas del vídeo. Al grabar, utilizó un fondo verde que luego eliminó para poder aplicar el efecto de iluminación dentro de los ojos de la máscara.
“La calidad que ofrece la cámara facilitó muchísimo el trabajo, especialmente los píxeles adicionales de la resolución 2.5K a la hora de utilizar una máscara para lograr el efecto de brillo en los ojos. En general, me encanta usar la Cinema Camera de Blackmagic porque el material grabado luce fantástico. Su precio es sumamente razonable y permite obtener buenas imágenes con poca luz, pero, para mí, su punto fuerte son los 13 pasos de rango dinámico y la capacidad de grabar en RAW, lo cual hace posible realizar los ajustes que sean necesarios durante la posproducción”, reconoce Tim Buttner.
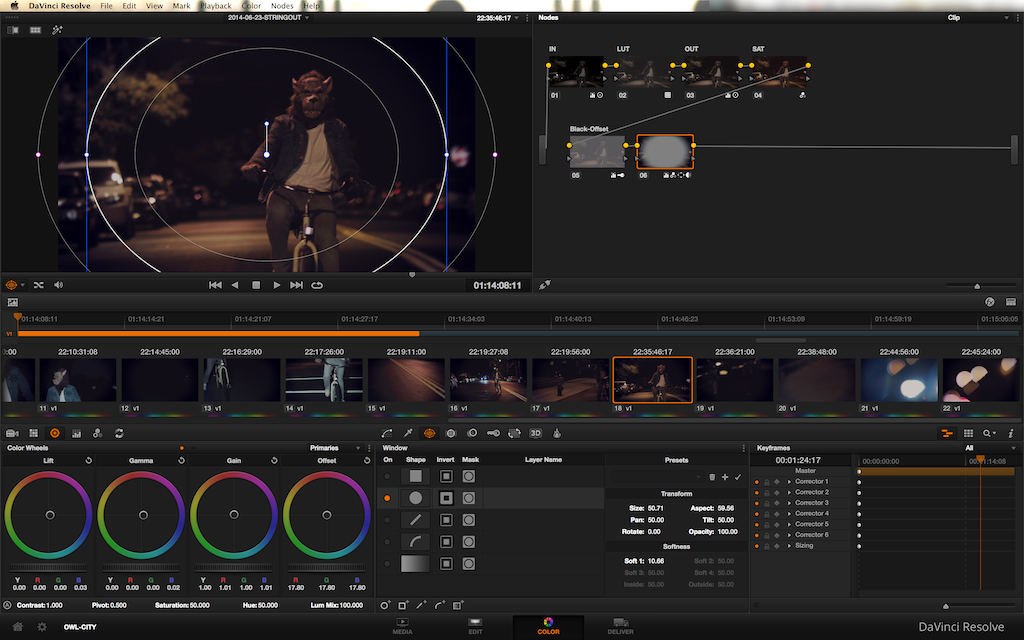
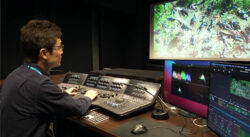
Etalonaje
Durante el etalonaje, Tim utilizó LUTs de VisionColor ImpulZ en algunas tomas como referencia y luego resaltó varios elementos mediante las Power Windows y el selector de colores de DaVinci Resolve 11.
Tim admite que DaVinci Resolve 11 le permitió “darle a las escenas de las bicicletas un aspecto diferente al de las tomas con bailarines. Pude resaltar más los tonos azules en las imágenes de los bailarines y contrastarlos con los tonos rojizos y anaranjados de las secuencias con bicicletas. Además, en el caso de estas, me pidieron que destacara la piel del lobo tornándola más roja y amarronada, y fue fantástico poder seleccionar esa parte específica de la imagen y usar una Power Window para realizar el seguimiento de la cabeza”.
Por otra parte, esta producción se utilizó frecuentemente la nueva herramienta de clonación de contenidos incluida en la nueva versión de Resolve. De este modo, Tim pudo respaldar y guardar los archivos digitales de la cámara mediante esta innovadora función que permite copiar el contenido de distintos discos, tarjetas de memoria y dispositivos de almacenamiento a diferentes destinos en forma simultánea. En la oficina disponía de dos discos duros, de modo que trabajaba con uno y realizaba copias de seguridad en el otro. Una vez finalizado el etalonaje, exportó los archivos para editarlos. A pedido del cliente, el material se entregó a través del sistema BitMAX en formato Apple ProRes 422 (HQ) a 23.98 f/s y en resolución 1920X1080.
Buttner destaca que “la corrección del color se llevó a cabo antes de la edición. No es el procedimiento normal, pero tenía sentido en este caso. DaVinci Resolve nos brindó un control total de las imágenes RAW, y fue realmente un placer poder usar una herramienta tan eficaz”.
[youtube]https://www.youtube.com/watch?v=IdVO1EG3Hes[/youtube]
Did you like this article?
Subscribe to our NEWSLETTER and you won't miss anything.
Related articles
 Curél apuesta por la Blackmagic Pocket Cinema Camera 6K para su último anuncio
 Takeshi Kitano etalona ‘Kubi’, su último drama histórico, con DaVinci Resolve
 Las Blackmagic Pocket Camera y Cinema Camera 6K amplían sus posibilidades con el software 8.6
 Oleada de novedades Blackmagic en IBC 2023: Cinema Camera 6K, Studio Camera 4K Plus G2…
 Immersive MMG mixes and masters music content with Fairlight by DaVinci Resolve
 Brotherhood utiliza la Pocket Cinema Camera 6K G2 de Blackmagic para rodar su último recetario
 Patrick Kalyn post-produces his latest short film with DaVinci Resolve's Fusion and Fairlight modules
 SoKrispyMedia produces popular video with Blackmagic Cloud and DaVinci Resolve Studio 18
SoKrispyMedia produce vídeo de gran popularidad con Blackmagic Cloud y DaVinci Resolve Studio 18
SoKrispyMedia produces popular video with Blackmagic Cloud and DaVinci Resolve Studio 18
SoKrispyMedia produce vídeo de gran popularidad con Blackmagic Cloud y DaVinci Resolve Studio 18
 Pocket Cinema Camera 4K y 6K captan el último concierto de MisterWives
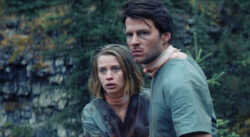 Rob Grant filma ‘Alive’ con Pocket Cinema Camera 4K y etalona con DaVinci Resolve
 Oscar winner Claudio Miranda trusts DaVinci Resolve Studio and DaVinci Resolve Mini Panel from Blackmagic
 Blackmagic permite ahora dar formato a dispositivos de almacenamiento desde las Cinema Camera y Pocket Cinema Camera
 Auryn crea un look muy especial con la Blackmagic Cinema Camera en su último videoclip